There is a specific kind of nervousness I see when someone realizes they have to reach up and touch the camera behind their mirror. They know it runs the lane keeping and the automatic braking, and they are terrified that one wrong swipe will break something expensive. Good instinct, honestly. This is the one sensor where being gentle actually matters.
The good news is that cleaning it is safe and simple once you know what to touch and what to leave alone. I have done this hundreds of times, and I have also fixed a few cars where an owner got aggressive and caused a problem. Let me show you the careful way.
Key takeaways
- To clean a windshield ADAS camera, you almost always clean the glass in front of it, not the lens itself, which sits sealed inside the housing.
- Use a clean microfiber cloth and either plain water or automotive glass cleaner. Never use ammonia glass cleaner or a paper towel.
- The whole job takes 10 to 15 minutes and costs nothing, versus a $100 to $200 diagnostic if you let a shop chase a dirty-camera warning.
- Cleaning does not knock calibration off, but hard prying or removing the housing can, so keep it light.
Understand what you are actually cleaning
This is the mistake almost everyone makes. They assume they need to reach the camera lens and wipe it directly. In reality, the lens sits inside a sealed housing, looking out through the windshield. What gets dirty is the glass, not the lens.
So ninety percent of the time, cleaning the camera means cleaning a small patch of windshield directly in front of the camera window. Bug residue, road film, hard-water spots, and a hazy inside surface are the usual culprits.
If you have never located the camera, it is the black housing pressed against the top of the windshield right behind your rearview mirror. For the full map of where it and every other sensor lives, see where ADAS sensors are located on a car.
Good to know
The dirty glass is often on the inside of the windshield, not the outside. Off-gassing from the dashboard leaves an oily film right where the camera looks through. If the outside is spotless but you still get errors, clean the inside of the glass in that zone.
Gather the right supplies
You do not need much, but the wrong product can do harm. Here is exactly what to grab.
- Two clean microfiber cloths, one damp and one dry.
- Automotive glass cleaner labeled ammonia-free, or just plain distilled water.
- A step stool if you are short, so you can reach without straining and pressing.
- Good lighting so you can see the film you are removing.
Watch out
Never use household glass cleaner with ammonia, and never use paper towels. Ammonia can cloud certain coatings over time, and paper towels leave fine scratches and lint. Both create exactly the kind of haze that makes the camera unhappy.
The step-by-step method
Here is the sequence, and it is intentionally slow and boring. Boring is what protects the calibration.
Step 1: Clean the outside glass first
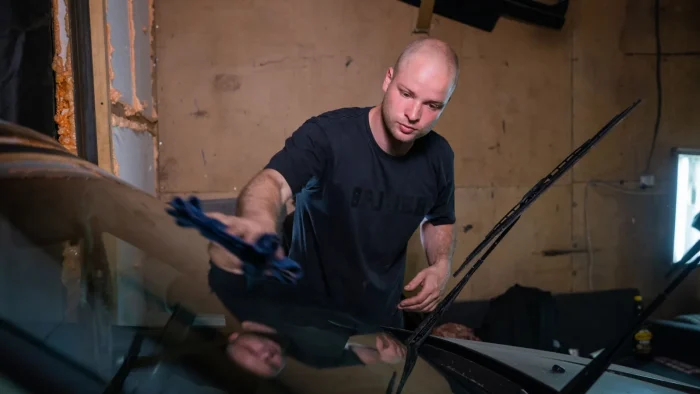
From outside the car, lightly mist the windshield in front of the camera housing with your cleaner or distilled water. Wipe with the damp microfiber using straight, gentle passes, then buff dry with the second cloth. Look at the clear window in the housing and make sure the glass in front of it is spotless.
Step 2: Clean the inside glass in the same zone
Now get inside and reach up behind the mirror. Spray the cleaner onto the cloth, never directly onto the glass near the housing, so no liquid runs into the electronics. Wipe the inside of the windshield right in front of the camera window, again with light straight passes.
This inside surface is the one people forget, and it is where the dashboard film builds up. Getting it clean often clears an error that outside cleaning alone could not touch.
Step 3: Check the camera window itself
Look at the small clear window in the housing. If there is dust or a smudge on the outside face of that window, you can very lightly dab it with the corner of a slightly damp microfiber. Do not press, do not scrub, and do not pry at the housing.
You are dusting a camera, not scrubbing a skillet. If you find yourself using force, stop, because force is what shifts calibration and turns a five-minute job into a shop visit.
What not to do
The don’ts here matter more than the dos, because this is where I see damage. Keep these in mind.
| Do | Don’t |
|---|---|
| Use ammonia-free cleaner | Use household ammonia cleaner |
| Wipe with soft microfiber | Use paper towels or a shop rag |
| Spray cloth, not the housing | Spray liquid into the electronics |
| Light, straight passes | Pry, twist, or remove the housing |
The single worst thing you can do is try to pop the housing off to reach the lens. That housing is aligned as part of the camera’s calibration, and pulling it can throw the aim off. If that happens, the system needs professional recalibration, which is a real cost you can easily avoid.
When cleaning does not fix it
Sometimes you clean everything and the warning stubbornly returns. That tells you the problem is not surface dirt, and there are a few likely reasons.
The first is condensation inside the housing. If you see fog or droplets behind the camera window that will not wipe away, moisture has gotten inside the seal. No amount of outside cleaning helps, and I explain what to do in condensation inside a backup or ADAS camera.
The second is windshield tint over the camera. If a shop tinted your glass or ran a strip across the top without leaving a cutout, the tint itself can block the camera. That is a coverage problem, not a dirt problem, covered in aftermarket tint blocking your ADAS camera.
Tip
If the error only shows up in bright sun or at dusk, suspect glare or a smudge you missed on the inside glass rather than a failed camera. Cameras struggle with a low sun and a hazy windshield together, and a proper inside cleaning often solves it.
Does cleaning affect calibration?
This is the fear that keeps people from ever touching the camera, so let me settle it. Gentle cleaning of the glass does not affect calibration at all. Wiping the windshield is exactly like cleaning any other part of your glass.
Calibration only gets disturbed when the camera physically moves. That happens during a windshield replacement, when the whole camera comes off with the old glass, or if you forcibly remove the housing. If your camera errors started right after new glass, that is a calibration issue, and you can read why in windshield replacement and camera recalibration.
So clean away, just keep it gentle. You are not going to knock anything out of aim with a soft cloth and light pressure.
Should you do this yourself?
For the windshield camera, cleaning the glass is genuinely a driveway job for almost anyone. It is low-risk as long as you follow the light-touch rules and never remove the housing. The only time I would hand it off is if the housing itself needs work, which is service-level, not maintenance.
If you want a clearer line on which sensor jobs are safe DIY and which are worth paying for, I sorted it out in DIY vs professional ADAS sensor cleaning. And for the big picture on how this camera fits with every other sensor on the car, the hub guide to ADAS cameras and sensors connects all the dots.
For a plain-language look at what this camera actually does for you on the road, MyCarDoesWhat is a helpful outside reference.
Keep that little strip of glass clean, respect the light touch, and your forward camera will keep doing its quiet job of watching the road so you do not have to catch everything alone.
Questions drivers ask
No. Gently wiping the windshield glass in front of the camera does not disturb calibration at all. Calibration only shifts if the camera physically moves, such as during a windshield replacement or if you forcibly remove the housing.
Use a clean microfiber cloth with ammonia-free automotive glass cleaner or plain distilled water. Avoid household ammonia cleaners and paper towels, since both can cause haze or fine scratches that make the camera throw errors.
The dirty surface is often the inside of the windshield, where dashboard film builds up right in front of the camera. Clean that inside zone too. If a fog or droplets sit inside the housing, that is internal condensation, not surface dirt.
No, do not remove the housing. It is aligned as part of the camera's calibration, and pulling it can knock the aim off and require professional recalibration. The lens is sealed inside, so cleaning the glass in front of it is all you need.
Only when an error appears or after heavy bug or road film builds up in that zone. There is no set schedule. A quick wipe of the inside and outside glass in front of the camera during a normal wash keeps it happy.